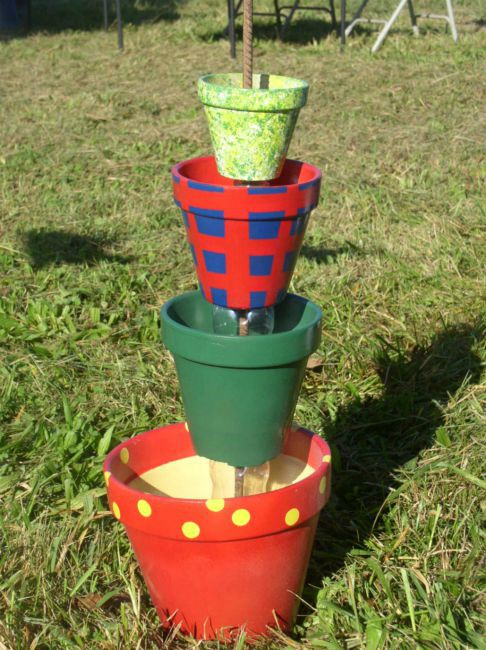
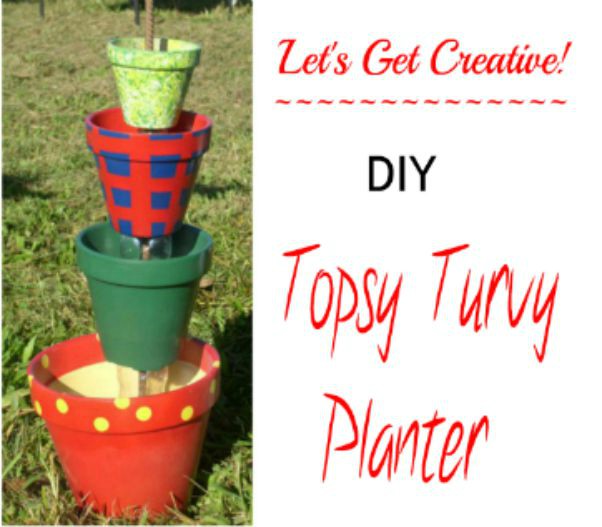
This is another easy to make garden art project, that will look so cute sitting in your flower bed! Check your local garden center for clay pots. They should be going on sale soon, so that the retail stores can make room for their (gasp) Christmas merchandise. These would make wonderful gifts. (It’s July as I write this, so dare I say Christmas gifts?)
Gather Your Supplies
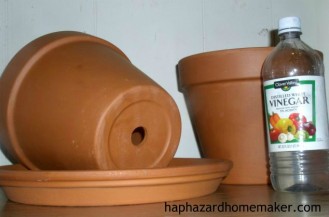
I found all of the necessary supplies at my local big box store. Choose your favorite paint colors and theme, and get creative. This is also a great project to use up left over spray paint.
If you have a bunch of old clay pots stacked in the corner somewhere, you could scrub them up and use them.
- four clay pots, 4″, 6″, 8″ and 10″. Add a 12″ pot for a five pot planter, if desired.
- one can white spray paint (If you don’t want the polka dots, skip the white paint and dot stickers. Or use a different color for the polka dots.)
- four or five cans spray paint (your choice of colors)
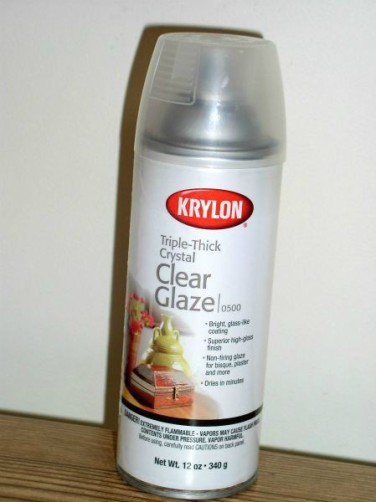
- one can Rust-oelum Triple Layer Glaze <<<IMPORTANT<<<
- one 36″-48″ metal garden stake (See Putting the Topsy Turvy Planter Together below for information on determining length)
- a little white vinegar
- a scrap of sandpaper
Additional supplies determined by design:
- package of price tag dot stickers
- sea sponge
- masking tape
- rubber stamps with appropriate acrylic paint color
- paint pens for fine lines or outlines
How to Clean Terra Cotta Pots
 The following cleaning instructions are from my Terra Cotta Birdbath post.
Sand pots lightly to remove blemishes and rough spots.
Check that the garden stake fits through the drain holes loosely. If not, enlarge the hole by sanding.
Wipe with a solution of 1/2 cup white vinegar to 1 gallon water. I like to let mine dry overnight. They have to be 100% totally dry, or the paint will peel at some point.
Let the Painting Begin!
Lay down a piece of cardboard or spread newspaper on your work surface. Apply two base coats of paint. Let the paint dry well between coats.
To Paint the Polka Dots:
- Spray the area where the dots will be with
 the undercoat color. I used yellow on the red pot.
 - After the paint dries, apply the stickers firmly in a random pattern around the rim.
- Turn the pots upside down and spray with the final color of choice spray paint.
- Let dry completely, then apply a second coat.
- Turn the pot right side up to paint the upper rim and inside the rim. I inserted a paper plate to keep the inside of the pot yellow. Not that it really made any difference, since it will be filled with soil.
- Let dry, and apply a second coat.
Carefully lift the edges of the stickers with a finger nail or toothpick and gently pull the stickers off.
As you can see, I didn’t have one sticker pressed down tight enough. It was a pain to fix. I could have just covered it with a cute rubber stamped image. Just saying…
To Paint the Plaid:
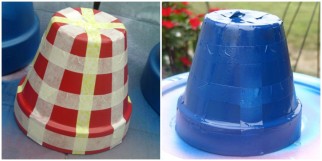
- Spray the two base coats first. Let fully dry between coats.
- When fully dry, apply masking tape, pressing down edges well.
- Spray with top coat color. Apply a second coat, if necessary.
- When dry, carefully pull off the tape in a slow steady movement.
Painting Ideas:
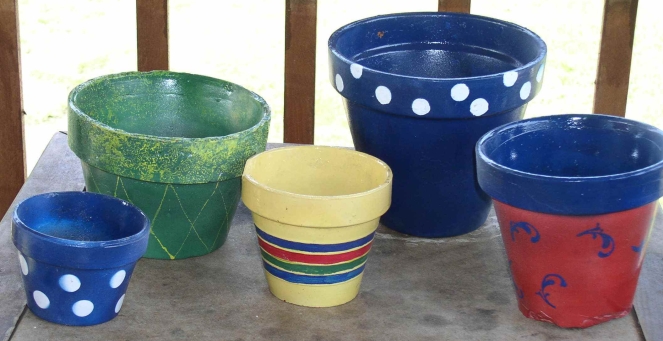
I painted these older pots for a friend. The green pot had some chips around the edges, so I used a sponge-painting technique to hide the chips. I free-handed the yellow lines with a paint pen. The yellow pot had raised ridges around it, so I painted the stripes with the main colors of the other pots with acrylic craft paint. She loved living in New Orleans years ago, so I used a “fleur-de-lis” type rubber stamp on the red pot.
In the picture below, the top pot is painted white, then sponge painted with both yellow and green acrylic paints. The green pot has a large sponge stamp image on the other side, like I used on the Terra Cotta Birdbath linked below.
I also painted vertical stripes on the largest pot on another set I painted last year, and outlined the edges of each strip with a black paint marker.
The Final Finish!
When everything is totally dry (I let mine dry over night), apply one or two coats of Rust-oleum Triple Layer Glaze varnish, following directions on the can. The glaze came highly recommended from a friend who is a master at painting clay pots.
Note: It is important when painting Terra Cotta pieces to insure complete coverage. If moisture is absorbed by the Terra Cotta, the paint may bubble and flake off.
Putting the Topsy Turvy Planter Together
You need a sturdy metal garden stake to keep your pots in place. You can also find 1/2″ rebar at building supply stores, just make sure it will fit and move freely through the hole in the bottom of the pots.
Measure the height of each pot, and add all of those numbers together, then add an additional 12″ or so. The garden stake needs to be long enough to go into the ground at least 10″-12″ and even with the top edge of the top pot when they are stacked.
These would be cute with a solar light slid over the top end of the garden stake, where it would be just above the top plant.
These pots were not planted, because they were painted for a give-away.
- Decide on the location for your planter and hammer the garden stake into the ground. Make sure you know there are no pipes or electric wires underground.
- Slide your largest pot over the stake. Fill the pot with potting mix or potting soil. It’s easier to plant each pot before adding the next pot.
- Add the next smaller pot, setting it at an angle on the soil below. Fill and plant.
- Add the next smaller pot and plant. Continue with the rest of the pots. Be sure to angle pots in different directions.
This takes very little time to actually paint. But it could take two or three days total because of all of the drying time.
I shared this Terra Cotta Birdbath on a previous post. Check it out for additional painting tips and ideas. FYI, to avoid any confusion, this birdbath is sitting on a blue tablecloth.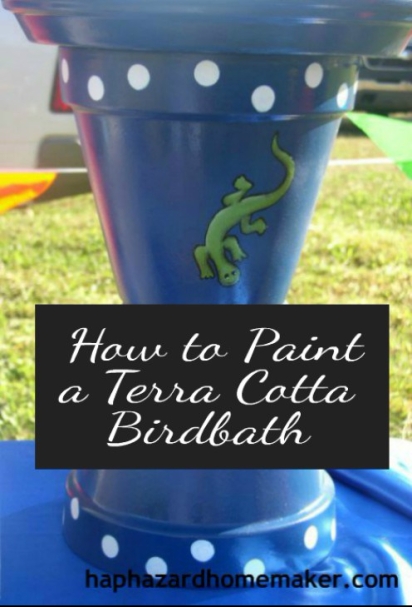
I hope you give this a try. It was a lot of fun for me! If you do make one, be sure to share a picture in the comments. I would love to see your creation!
Happy Painting!
Robin
PS: If you like this post, please share this on Pinterest. Thanks!

That is so CUTE!
LikeLiked by 1 person
Thank you! 🙂
LikeLiked by 1 person
I love these thank you for the instructions!
LikeLiked by 1 person
My pleasure!
LikeLike
Love it!! My herbs would be great in that! The salamander is so cool!!
LikeLiked by 1 person
Thanks! I meant to include in the post that these look beautiful with any kind of plant, including flowers, succulents and herbs. I find a lot of cute large rubber stamps at Walmart. Adding a little outlining and a little highlights make the designs pop.
LikeLiked by 1 person
Yes, I noticed the outline right away! It gives it such a nice custom look! I can’t believe it was a stamp!
LikeLiked by 1 person
Yep, and the goldfish is super cute too. Check them out, I think they were only a dollar or so each. Hobby stores probably have them too, but the nearest one is 50 some miles aways for us.
LikeLiked by 1 person
🙂
LikeLike
I love your colors! This is so cute!! 😀
LikeLiked by 1 person
Thank you! I used spray paint colors I already had on hand, but it was fun figuring out how to mix them up. 🙂
LikeLiked by 1 person
Did you space with empty plastic 2 liter soda?
LikeLiked by 1 person
That was only for display purposes. I painted both the bird bath and the Topsy Turvy planter for the Master Gardeners to raffle off.
LikeLike
I really like the plaid and all of the bright colored designs you created. That would be fun in the garden, rather like a topiary.
LikeLiked by 1 person
Thank you! It was fun to paint, too.
LikeLike
So cool! I’m glad I stumbled upon this because of KelleysDIY blog post 🙂 I’ve been meaning to do this in my small patio and feel confident enough it won’t fall over. Thank you!
LikeLiked by 1 person
My pleasure! 😀
LikeLiked by 1 person
I love this idea Robin and the way you decorated all the pots. It would make my heart smile if we had something like this in our garden
LikeLiked by 1 person
Thank you! It’s so easy to do. You should make you one. 🙂
LikeLike
What a delightful post and great idea. Spring is here and with it a chance to play around with outdoor crafts projects.
LikeLiked by 1 person
Cool! You will have so much fun making one!
LikeLike
Sooo cute! I will definitely try this. 🙂
LikeLiked by 1 person
Awe, thank you! I would love to see your creation!
LikeLiked by 1 person