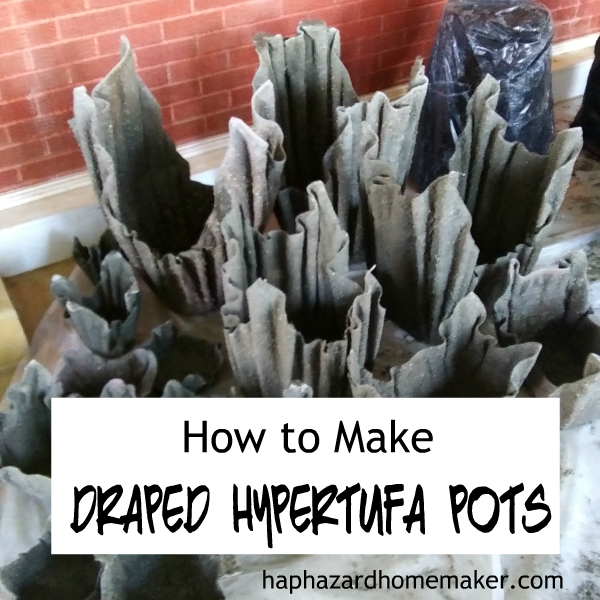
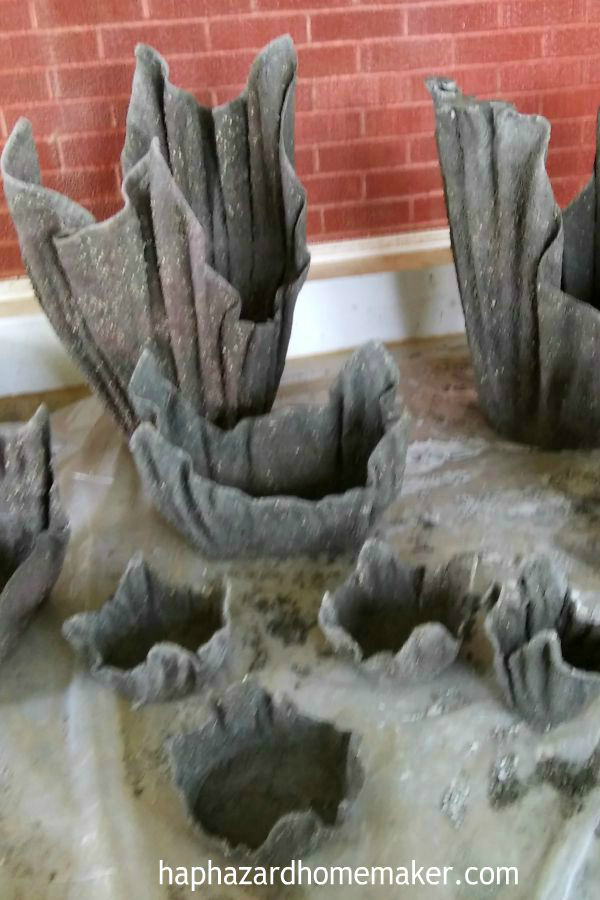
Have you heard of hypertufa? it’s a light weight cement mixture that can be used to make all kinds of things. I’m going to show you how to make these beautiful Draped Hypertufa Pots. You may have heard them called cement fabric pots. They are super attractive, whether left natural or painted. Our local Master Gardeners are making these to sell at our 10th Annual Spring Fling Plant Fair.
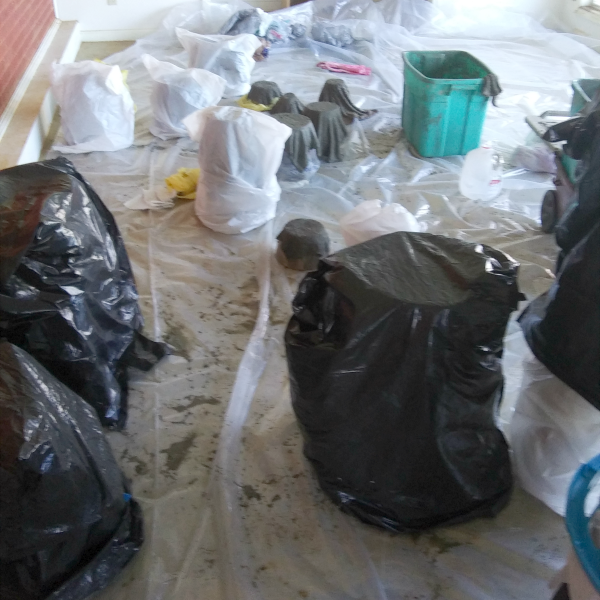
They are super messy to make and it was cold and/or wet, so we were lucky to have a huge empty sunroom to work in. Because of the curing time involved and the participants schedules, we made plans to meet there every two days for 2 or 3 hours for a week. Don’t let this scare you off from making these, because even though they are so easy to make, we were doing this in stages and on a grand scale.
For the fabric, we found thicker 100% cotton towels and washcloths worked best. Used towels are soft and pliable, which makes it easy to form the folds. The towels HAVE to be absorbent to hold the cement mixture. The walls and bottoms of these draped hypertufa pots are only as thick as the cement saturated towel. That’s not to say you can’t possibly use a thinner fabric, but then there will be an additional step to make them sturdy enough. Also bear in mind, that you will be lifting this wet heavy cement filled fabric. Anything bigger than a bath towel may need two people to lift.
NOTE: These directions will make up enough hypertufa mix to cover one large bath towel and 1 or 2 washcloths.
Draped Hypertufa Supplies
- plastic or cardboard to put under your draped tower
- trash bags and plastic grocery bags
- items to make towers
- rubber kitchen gloves
- dust mask
- large towel and 1 or 2 wash cloths
- container to mix cement mixture
- Portland cement
- peat moss
- vermiculite or perlite
- mortar mix
- Cement bonding agent
- water (for mixing and clean-up)
Resources at end of post.
Draped Hypertufa Preparation
- Make the towers. We used upside down clothes hampers, two 5 gallon buckets, two paint cans, etc to make sturdy towers. Stack buckets and cans, if needed. The hypertufa is easier to remove if whatever you use for a tower is slightly flared out at the top. Have a couple of small towers ready too for the wash cloths.
- Cover the towers with plastic bags and position them ready to cover with the draped fabric, so they don’t have to be moved once draped for at least 2 – 3 days. The curing area should be in a cool location, out of the sunlight.
- Remove the tags on all of the towels and it was also suggested to round the corners on the larger towels. I suspect the reason being that the points may be more prone to breaking. We did on a couple, but left the others pointed.
Take a break at this point if you need to. The rest moves pretty quickly.
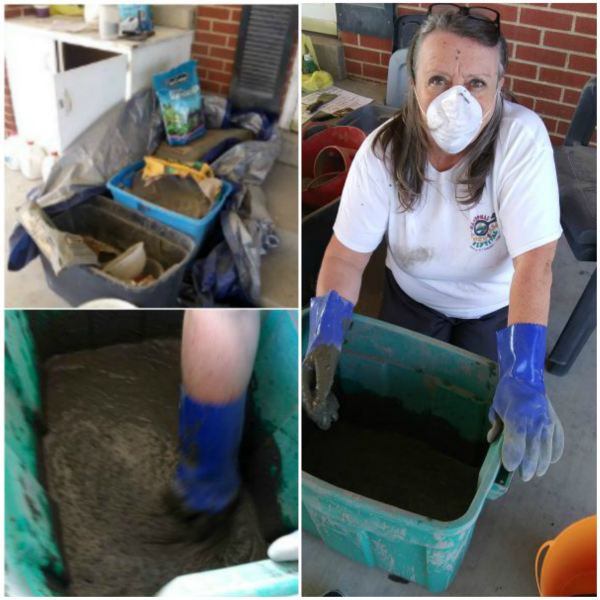
Next, mix up your hypertufa mix in a plastic tub, bucket or cement mixing pan. It needs to be large enough to mix your ingredients and work your fabric into the cement mixture.
Draped Hypertufa Recipe
PUT ON RUBBER GLOVES AND A DUST MASK
- 4 quarts sifted Portland cement
- 1 quart sifted peat moss
- 2 cups vermiculite (or perlite)
- 2 cups mortar mix
- water, about one gallon, but added in a little bit at a time
Measure the dry ingredients together. If you are adding a bonding agent, pour 2 or 3 ounces in a quart of water and shake well. We used a half-gallon milk jug for plenty of mixing room. Stir the liquid into the cement mix. Now start adding water A LITTLE AT A TIME, mixing well after each addition of water. The consistency should be similar to thick pancake batter or thin mashed potatoes.
Draped Hypertufa Directions
Check that the plastic is still completely covering the towers. Have the large towel and 1 or 2 washcloths handy to use up the last little bit of cement mixture.
- Get your draping material wet, wring out enough that it isn’t sopping wet.
- Drape it over the plastic covered tower to get an idea on where you want it to hang and how the folds will look.
- Dip into the prepared cement mixture, flipping and swishing it until the fabric is fully saturated. Let it soak for 5 or 10 minutes to absorb as much as possible.
- Lift it up by two corners, then gently lay it over the top of your tower. Move it around to get the desired placement.
- Arrange the folds in a pleasing way.
- Cover each piece with a large trash bag or plastic bag.
- As SOON as you finish draping and covering the tower, rinse off your gloves, any tools you used and your mixing container before the cement is dry. Do not do it in a sink, bath tub or any other drain. It is safe to pour it out on the ground and then hose the area down with clean water. We just cleaned our items in a tub of water, then emptied it over a gravel area.
- Let sit undisturbed for 24 to 48 hours. A cool garage, basement or shaded area is perfect, so that it cures slowly.
- After the initial curing of 24 to 48 hours, if the draped towel feels firm, remove the top plastic bag.
- Carefully remove the tower from the inside of the draped hypertufa. It is still somewhat pliable at this stage, but it can still crack. Remove the inner bag.
- Set the draped hypertufa upright, then recover with one of the plastic bags.
- Let it sit for another 24 hours.
- Remove the plastic covering and make sure it feels firm and very hard.
Ours took an extra couple of days to cure on each stage because of cold damp weather.
Finishing the pot
- If the hypertufa feels too thin, put it back on the tower. Mix up a smaller amount of the cement mixture (minus the vermiculite and peat moss) and add another coat using a paint brush. Cover and let cure for another 24 – 48 hours and then unmold.
- You can use a masonry bit to drill drain holes in the draped hypertufa pot after it’s fully cured.
- These need to be leached before plants can be put directly in pot. Fill a quart spray bottle with about 1 cup vinegar and fill the rest with water. Shake well. Spray the pot inside and out, 3 or 4 times a day for a couple of days to leach the lime out of the cement.
- Leave natural or use spray paint to add color to your hypertufa pot.
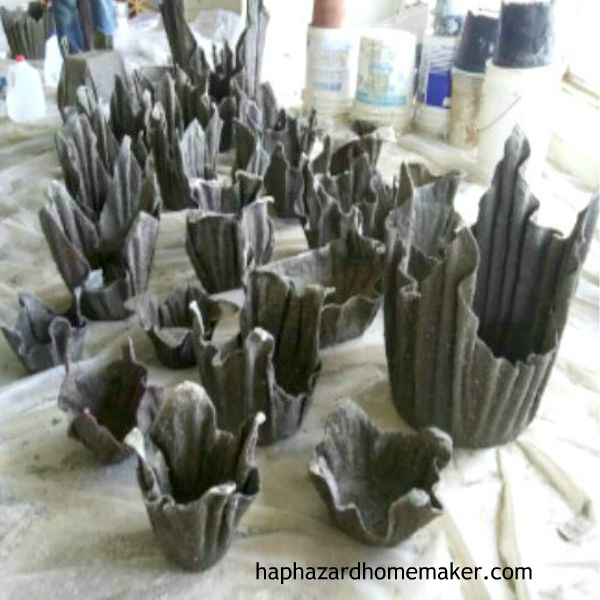
Viola! You have just created a beautiful draped hypertufa pot!
This is a wonderful video that shows the steps from mixing to unmolding.
Resources:
We are a participant in the Amazon Services LLC Associates Program, an affiliate advertising program designed to provide a means for sites to earn advertising fees by advertising and linking to Amazon.com and affiliated sites.
The hardest part for this project was finding the Portland cement locally, because we live in a small town. Lowe’s and Home Depot both sell it, as well as some building supply stores. I found the mortar mix where I found the Portland cement. Make sure you have help to unload it at home, because the Portland cement was 94 pounds and the mortar mix was 60 pounds. I’ve heard the Portland cement also came in 47 pound bags, but I didn’t find any.
If you have trouble finding the other hypertufa ingredients they can be found on Amazon: vermiculite, perlite, and bonding agent. Here’s a link to red cement color, but there are several colors available. None of the stores we contacted had cement color in stock, so we decided to just use spray paint on the ones we wanted color.
We bought rubber gloves and dust masks from a dollar store. The remaining supplies were things we all brought from home.
Aren’t they gorgeous! Be sure to follow this blog to see an update with pictures after we get some painted and planted.
Robin

Interesting! Never heard of such a thing.
LikeLiked by 1 person
They are beautiful in all different colors and potted up with pretty flowers.
LikeLiked by 1 person
I love these!!! I have concreted elephant ear leaves before but never heard of these. Thanks!
LikeLiked by 1 person
I bought an elephant ear bulb to plant just for leaves to do this. 🙂 I brought several home to paint. I just have to decide what colors.
LikeLiked by 1 person
Robin, these are so cool!! I can’t wait to try them and they are def on my list to make! I saw someone make a bird feeder using a giant leaf as a mold once but wasn’t too impressed with the way it turned out but these are really cool!! I love all your helpful hints, too! Thanks for this post!
Mollie
LikeLiked by 1 person
Thanks! Glad you liked them. 🙂
LikeLiked by 1 person
I LOVE them!!
LikeLiked by 1 person
So…are you going to make you some?
LikeLiked by 1 person
I sure am! 🙂
LikeLiked by 1 person
Yay!
LikeLiked by 1 person
That is something I have been wanting to try for ages!!! They are awesome!
LikeLiked by 1 person
Me too! It’s been on my list since the first one I saw and when I presented the idea and pictures to our members, everyone loved the idea! Anxious to get some leached and painted. 🙂
LikeLike
At one of the hardware stores in Canada they sell a craft concrete that I’ve wanted to try. I’m pretty sure it’s even premixed which is handy. I’ve only ever worked with concrete once and it was just to even out a front porch…. no finesse there lol… just a big mess, which could be why I haven’t jumped right in.
I love the way those pots look that you did… enough so that I am back on the concrete bandwagon lol!
LikeLiked by 1 person
Seriously, these are super easy! couple of batches of too thin cement,
LikeLike
I think it’s time then lol…. well, once my granddaughter’s birthday and Easter are done 😓
LikeLike
Sorry I messed up that comment. Typing on a phone with fat fingers doesn’t work!
Our mess came because we had a couple of batches of too thin cement mix, so it dripped all over, and then we painted on a thinner cement mix on some we thought were too thin.
You will have to share your projects when you get them done!
LikeLike
I wondered about the last comment lol… I have texting/messaging issues to…. and I will definitely let you know when I try it! Thank you for reminding me of how much I wanted to play with concrete!
LikeLiked by 1 person
My pleasure!
LikeLike
Robin, you are so talented. I learned a new thing –
LikeLiked by 1 person
Thank you!
LikeLiked by 1 person
My pleasure
LikeLiked by 1 person
Wow very dramatic and beautiful!
LikeLiked by 1 person
Thank you! 🙂
LikeLike
What an awesome idea Robin!! Can’t wait to see them finished!
LikeLiked by 1 person
I’m hoping to get some painted in a few days. We’ve had a lot of days with either lots of rain or high winds lately, so haven’t completed them yet. The hypertufa was a huge project requiring a lot of time on my part coordinating everything, but well worth it! It’s very similar to your cement project, except the cement mix was slightly thinner. Looking forward to making some of your’s soon. 🙂
LikeLiked by 1 person
I’m excited to try this Robin, I can see them upside down hanging with a light inside.❤️️☺️❤️️
LikeLike
Robin, those are beautiful! What a cool project…they remind me of something I might find on a coral reef! My imagination is going wild with what I could put into one of those 🙂
LikeLike
These are so cool! I can’t wait to make some for my garden!!
LikeLiked by 1 person
Thank you! I thought so too when I first saw them online. They are beautiful whether painted or left natural.
LikeLike
Please demonstrate thrugh videos on how to make these flower pots rather than writing a story
LikeLiked by 1 person
Thank you for visiting my blog. There is a video at the bottom of the post that shows the entire process. 🙂
LikeLike