Bill paying…. it’s a necessary fact of life. I struggled for years finding an easier way to manage the paper clutter and keep track of bills. Especially challenging in a small home with a minimum of storage. I finally learned a few tricks to make it almost painless. Well, almost….
In the past, I’d have the bills spread out all over my desk. I had one pile of mail on my right side that I had to sort through to find the bills and another pile of papers on my left side to file after paying the bills. The pile on the left rarely got filed, because it was a pain to get to the filing cabinet buried in the closet, which is full of papers 10-12 years old. Yep, the struggle was real.

This almost worked…

I ran across this idea on Pinterest of using a plastic magazine file for folders with a calendar hanging on the front. That was kind of helpful, but still didn’t work well for me. However, I did use it for a couple of years to give it a fair chance. The calendar was too small for my taste and the files were too awkward to open.
This is what works best for me…
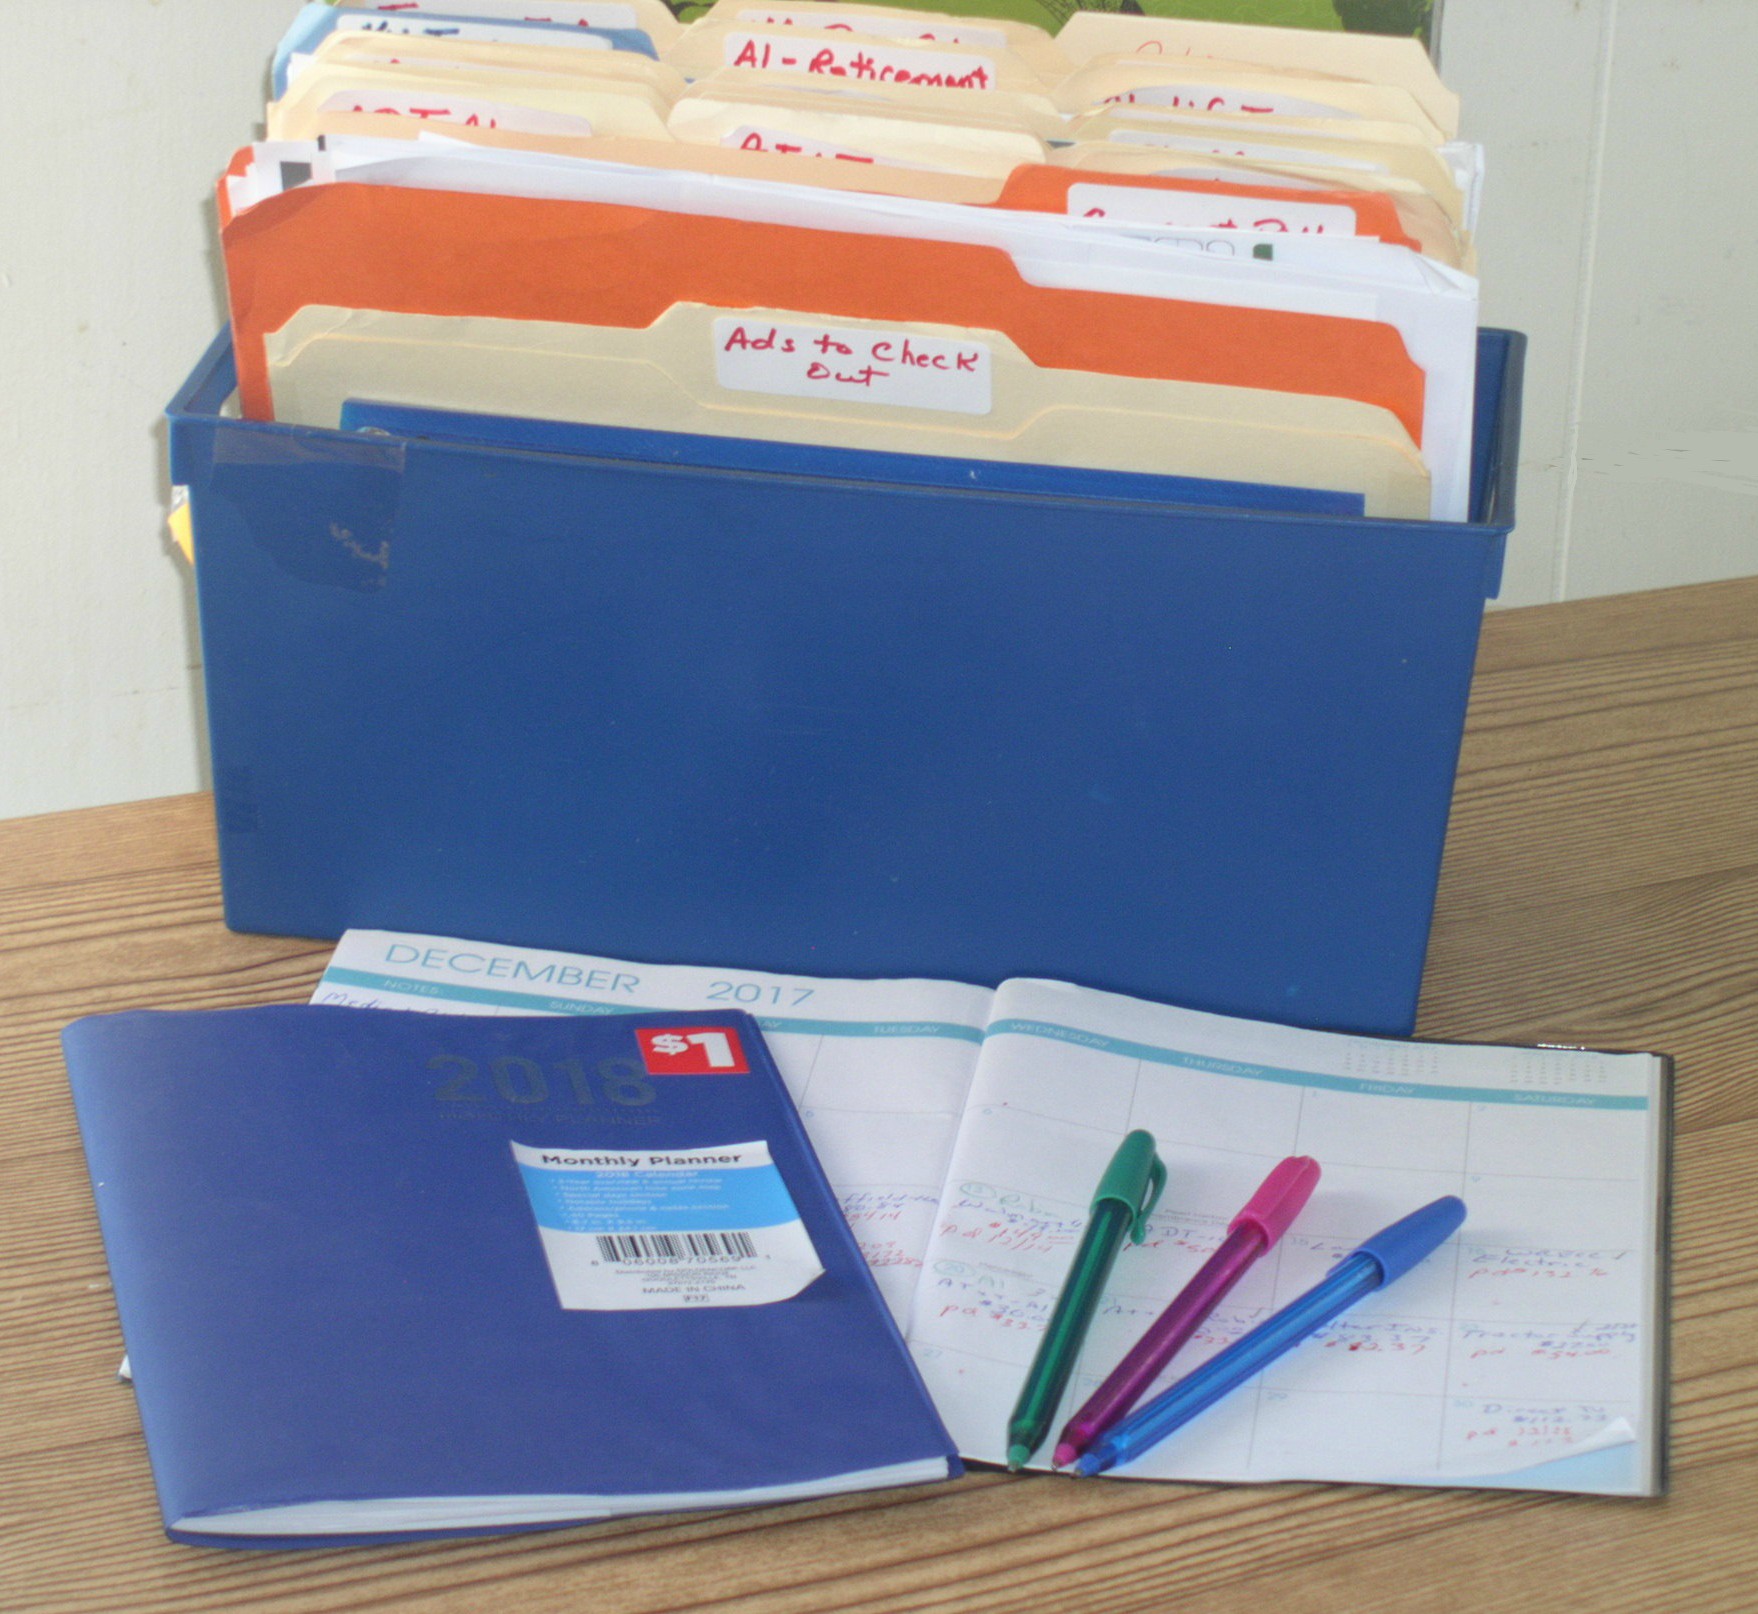
I had this container that I found at the Dollar Tree a few years ago. I like it so much better! I know…I should have straightened all of the files and papers before I took the picture, but I’m just keeping it real (wink). I used file folders that I already had on hand, but after seeing it here, I think I may buy some pretty folders on my next trip to town. I really like that there is more room for the folders to open.
I labeled a folder for each bill, retirement account and insurance policy we have, and then arranged them alphabetically. The orange file is where I put bills that need to be paid. There was no particulate reason for using an orange folder, it’s just what I had on hand.
I cut one folder down several inches and labeled it “Ads to Check Out”. Sometimes we get things in the mail or find in magazines that I am interested in, but want to think about, so here’s a place to put them. Close at hand, but out of sight.
I stuck a blue divided pocket file in the front to file store receipts by the month.
The secret to my success!
I am a visual person, so I really like using the “month on 2 pages” calendar from Dollar General and three colored ink pens. I write the name and amount of each bill in blue ink on the date it is due. If more than one bill is due on a particular date, I will write them on earlier dates and note the actual due date. Paydays and savings are marked with green ink. I use red ink to note payment details, such as date paid, confirmation numbers and account balances.
*This is an example of how I enter information on my calendar.
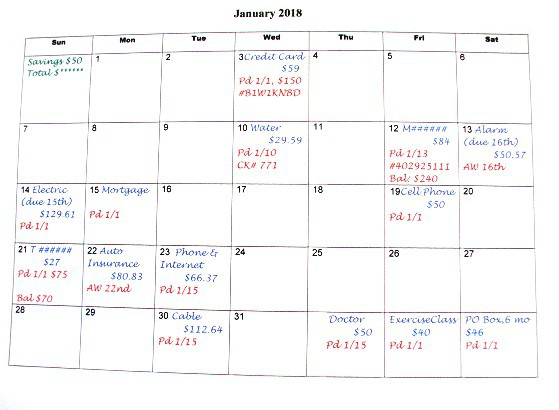
Because the majority of our bills are paid monthly, I fill in the calendar two or three months at a time, writing the names of accounts on the due dates. I flip back and forth between the month I am filling in and a previous month, to make sure I don’t miss anything.
I use the NOTE column to list medical bills that need to be paid. When I pay those, I will write the date in red ink next to it.
I keep the bill payment calendar in front of the orange folder. My pens are kept inside a little pouch taped inside the front corner of the plastic box.
My Bill Paying Routine…
As the mail comes in, I do a quick sort through, trashing anything we don’t need. I open the bills flat and put them in the orange file.
Each payday, I go through the orange folder and make sure the bills are arranged by date due. As I pay each bill, I write on the calendar in red ink the amount paid, the check number and the confirmation number (if there is one). Then, I write PAID on the bill and file it in the appropriate file folder. If there is a smaller bill or two that are due during the next pay period, I’ll go ahead and pay them.
The occasional bills that aren’t normal monthly bills, are written into the empty spots on the calendar at the beginning or end of the month.
I love that with this method, you can tell at a glance that everything has been paid. In case there is ever question about a past bill, you can easily find the information in the calendar.
At the end of the year, just pull all of the files out of the box and move them to the file cabinet and add new file folders for the coming year. No file cabinet? No problem. Put the stack of files in a box or bag, write the year on the side and put it on a shelf.
Update: It is now January 2024 and I am still using this method. The only thing that has changed is that all of our monthly bills are on autopay now. Credit cards are set up on autopay with a set payment higher than the minimum payment. I still have to pay medical bills either online or mailing a payment.
Instead of dreading and procrastinating sitting down to pay bills, I now do a weekly bank balance check to be sure bills have been paid on time and transfer money to savings. I also have a spiral notebook that I will write down the available bank balance, then subtract any outstanding bills that will be deducted before the next payday, to determine how much money we have available for groceries, gas, etc.
This method has taken all of the stress of bill paying away.
